Helper in codeigniter

Leave a Comment
Helpers, What is Helpers as the name suggests, help you with your work. Codeigniter helpers are do same thing. CodeIgniter has more than 20 helpers. Each helper file is simply a collection of functions in a particular category. Most of codeigniter helpers you use in your project. There are URL Helpers, that assist in creating links, there are Form Helpers that help you create form elements, Text Helpers perform various text formatting routines, Cookie Helpers set and read cookies, File Helpers help you deal with files, etc.

Unlike most of the other framework codeigniter helpers are not in OO(Object Oriented) format. Codeigniter helpers are simple, procedural functions. Each helper function performs one specific task, with no dependence on other functions.

Loading Helper in codeigniter at global level

Codeigniter not load helper file by by default. We have to load helper file name in config/autoload.php. After loading helper in atuoload.php file helper is globally available in your controller and views.
/*
| -------------------------------------------------------------------
|  Auto-load Helper Files
| -------------------------------------------------------------------
| Prototype:
|
| $autoload['helper'] = array('url', 'file');
*/

$autoload['helper'] = array('url','form');

Loading Helper in codeigniter at Controller level

Loading a helper file is quite simple using the following function:
$this->load->helper('name of your helper'); 
Where name is the file name of the helper, without the .php file extension or the "helper" part. For example, to load the URL Helper file, which is named url_helper.php, you would do this:
$this->load->helper('url');
You can load helper anywhere within your controller functions (or even within your View files, although that's not a good practice), as long as you load it before you use it. You can load your helpers in your controller constructor so that they become available automatically in any function, or you can load a helper in a specific function that needs it.
$this->load->helper( array('url', 'file', 'form') ); 
Using above method you can load multiple helper at one time, you can specify them in an array.

Send Email With Attachment Codeigniter

Leave a Comment
After Send email with codeigniter and Send email with codeigniter and smtp today we gonna look how to send email with attachment. Before we start i hope you know how to upload image in codeigniter. Because this tutorial is combination of the send email with codeigniter and upload image or attachment in folder. So let's start with controller i.e. Send_email.php
<?php if ( ! defined('BASEPATH')) exit('No direct script access allowed');

class Send_email extends CI_Controller {

 function __construct(){
    parent::__construct();
 }

 public function sendEmail()
 {
    if($this->input->post('send_email') == 'send_email'){
             $this->load->library('email');
             
              $config['upload_path'] = './uploads/';
              $config['allowed_types'] = 'gif|jpg|png';
              $config['max_size'] = '100000';
              $config['max_width']  = '1024';
              $config['max_height']  = '768';

             $this->load->library('upload', $config);
             $this->upload->do_upload('attachment');
             $upload_data = $this->upload->data();
             
             $this->email->attach($upload_data['full_path']);
             $this->email->set_newline("\r\n");
             $this->email->set_crlf("\r\n");
             $this->email->from('only4ututorials@gmail.com'); // change it to yours
             $this->email->to($this->input->post('email_id')); // change it to yours
             $this->email->subject($this->input->post('subject'));
             $this->email->message($this->input->post('body'));
             if ($this->email->send()) {
                 echo "Mail Send";
                 return true;
             } else {
                 show_error($this->email->print_debugger());
             }
    }else{
      $this->load->view('email_view');
    }
 }

}

Now lets start with view i.e. email_view.php
<!DOCTYPE html>
<html lang="en">
<head>
 <meta charset="utf-8">
 <title>Mass Email Example</title>
 <link rel="stylesheet" href="http://maxcdn.bootstrapcdn.com/bootstrap/3.3.5/css/bootstrap.min.css">
 <script src="//code.jquery.com/jquery-1.11.3.min.js"></script>
 <script src="http://maxcdn.bootstrapcdn.com/bootstrap/3.3.5/js/bootstrap.min.js"></script>
</head>
<body>
 <div class="container">
  <h1>Email Example With attchment</h1>
  <form action="<?php echo base_url()?>senddatabase_email/sendMassEmail" method="POST" enctype='multipart/form-data'>
    <div class="form-group">
      <label for="exampleInputEmail1">Enter Email</label>
      <input type="email" class="form-control" placeholder="Enter Email id" name="email_id"/>
    </div>
    <div class="form-group">
      <label for="exampleInputEmail1">Enter Subject</label>
      <input type="text" class="form-control" placeholder="Enter Email Subject" name="subject"/>
    </div>
    <div class="form-group">
      <label for="exampleInputPassword1">Body Content</label>
      <textarea class="form-control"  rows="3" placeholder="Enter Email Body Content" name="body"></textarea>
    </div>
    <div class="form-group">
      <label for="exampleInputFile">File input</label>
      <input type="file" id="exampleInputFile" name="attachment">
    </div>
    <button type="submit" name="send_email" value="send_email" class="btn btn-default">Submit</button>
  </form>
 </div>
</body>
</html> 

Send Email With Attachment Codeigniter


After filling all form when user click on submit function goes to sendEmail function which is written inside Send_email controller. To send attachment with email we use attach() function of email library.
$this->email->attach()

This above function enables you to send an attachment. Put the file path/name in the first parameter. Note: Use a file path, not a URL. For multiple attachments use the function multiple times. To pass file path we have to upload attachment in folder and make sure folder must be writable (666, or 777). After uploading attachment we get all uploaded data in $upload_data. $upload_data is array we need only full_path key value to do we have do something like this
$upload_data = $this->upload->data();
$this->email->attach($upload_data['full_path']);

After that we are ready to send email to user with attachment.

Please comment down below if you have any query and please follows us for more awesome tutorials and keep motivating us .

Ajax Pagination in Codeigniter

Leave a Comment
We already did normal Pagination With Codeigniter. If you don't know how pagination is work in codeigniter then please go through first that tutorials.

In previous tutorial we already created all needed file for our pagination so let's continue with those files. Below image was our file structure.

Ajax Pagination in Codeigniter


For ajax pagination let's update our controller file i.e. pagination.php
<?php if ( ! defined('BASEPATH')) exit('No direct script access allowed');

class Pagination extends CI_Controller {

 function __construct(){
  parent::__construct();
  $this->load->model('mdl_pagination');
  $this->load->library('table');
  $this->load->helper("url");
 }

 public function country($offset=null)
 {
  $this->load->library('pagination');

  $config['base_url'] = base_url().'pagination/country/';    // url of the page
  $config['total_rows'] = $this->mdl_pagination->countcountry(); //get total number of records 
  $config['per_page'] = 10;  // define how many records on page
  $config['full_tag_open'] = '<ul class="pagination" id="search_page_pagination">';
  $config['full_tag_close'] = '</ul>';
  $config['cur_tag_open'] = '<li class="active"><a href="javascript:void(0)">';
  $config['num_tag_open'] = '<li>';
  $config['num_tag_close'] = '</li>';
  $config['cur_tag_close'] = '</a></li>';
  $config['first_link'] = 'First';
  $config['first_tag_open'] = '<li>';
  $config['first_tag_close'] = '</li>';
  $config['last_link'] = 'Last';
  $config['last_tag_open'] = '<li>';
  $config['last_tag_close'] = '</li>';
  $config['next_link'] = FALSE;
  $config['next_tag_open'] = '<li>';
  $config['next_tag_close'] = '</li>';
  $config['prev_link'] = FALSE;
  $config['prev_tag_open'] = '<li>';
  $config['prev_tag_close'] = '</li>';
  $config['page_query_string'] = FALSE;

  $this->pagination->initialize($config);

  $data['country'] = $this->mdl_pagination->getcountries($config['per_page'],$offset);
  $this->load->view('pagination',$data);
 }

}

We just added few parameter in pagination config for some basic design. Now lets update our view file
<html>
<head>
 <link rel="stylesheet" href="http://maxcdn.bootstrapcdn.com/bootstrap/3.3.5/css/bootstrap.min.css">
 <script src="//code.jquery.com/jquery-1.11.3.min.js"></script>
 <script src="http://maxcdn.bootstrapcdn.com/bootstrap/3.3.5/js/bootstrap.min.js"></script>
</head>
<body>
 <div id="container">
  <h1>Countries</h1>
  <div id="body">
  <?php
   $this->table->set_heading('id', 'code', 'name');
   echo $this->table->generate($country);
   echo $this->pagination->create_links();
  ?>
  </div>
 </div>
   <script type="text/javascript">
   $(function(){
    $('body').on('click','ul#search_page_pagination>li>a',function(e){
      e.preventDefault();  // prevent default behaviour for anchor tag
      var Pagination_url = $(this).attr('href'); // getting href of <a> tag
     $.ajax({
      url:Pagination_url,
      type:'POST',
      success:function(data){
       var $page_data = $(data);
       $('#container').html($page_data.find('div#body'));
       $('table').addClass('table');
      }
     });
    });
   });
  </script>
</body>
</html>

this is our view file we don't need to change in modal file for this. Now you are wondering what's going on view file i will explain but first let's check how our view file look like.

Ajax Pagination in Codeigniter


Let's back to our code i hope you know jquery because we are using jquery with ajax. All magic goes with this below code.
<script type="text/javascript">
   $(function(){
    $('body').on('click','ul#search_page_pagination>li>a',function(e){
      e.preventDefault();  // prevent default behaviour for anchor tag
      var Pagination_url = $(this).attr('href'); // getting href of <a> tag
     $.ajax({
      url:Pagination_url,
      type:'POST',
      success:function(data){
       var $page_data = $(data);
       $('#container').html($page_data.find('div#body'));
       $('table').addClass('table');
      }
     });
    });
   });
  </script>

After document load if user click on one of the pagination link then we have to first remove default behaviour of anchor tag to remove that we use
e.preventDefault();
after that using "this" we got url of that clicked anchor tag after that call that url using ajax method. on success function of ajax we getting return data in "data params". We store that "data params" in jquery "$page_data". After that we have to find "div#body" from "$page_data" because all our pagination data in that div. After finding data we have to replace old data with new data in "#container" div. We will get next page data on our same page without refreshing page. The last line
$('table').addClass('table');
is just for design part. I am using same controller function for fist time load and ajax call you can separate both function and also i am loading same view for both call you can also separate both file then you don't need to write so much jquery in ajax success function you have just do something like this
success:function(data){
       $('#container').html(data));
       $('table').addClass('table');
      }

I did this all thing because to give you optimize code for ajax pagination in codeigniter.

Please comment down below if you have any query and please follows us for more awesome tutorials and keep motivating us .

Multiple file upload in codeigniter

Leave a Comment
Hello guy's, Today we gonna look how to upload Multiple file image with codeigniter. After single image upload with codeigniter. We gonna look multiple image upload in codeigniter. First we gonna look multi upload with same controller function after we move that function into helper so we can use somewhere else also. So let's start with controller file

Multi_upload.php (controller)

<?php if ( ! defined('BASEPATH')) exit('No direct script access allowed');

class Multi_upload extends CI_Controller {

 function __construct(){
  parent::__construct();
 }

 public function index()
 {
  $arrData['error'] = '';
  $arrData['content'] = 'multi_image_upload';
  $this->load->view('template',$arrData);
 }

 public function do_multi_upload(){
  if($this->input->post('submit_form')){
   if($_FILES["profile_pic"]["tmp_name"]) {
    $this->do_miltiupload_files('./uploads/', 'M', $_FILES['profile_pic']); // call the function with params
   }
  }
 }

 function do_miltiupload_files($path, $title, $files)
    {   
        $config = array(
            'upload_path'   => $path,
            'allowed_types' => 'jpg|gif|png',
            'overwrite'     => 1,                       
        );

        $this->load->library('upload', $config);

        $images = array();

        foreach ($files['name'] as $key => $image) {
            $_FILES['multi_images[]']['name']= $files['name'][$key];
            $_FILES['multi_images[]']['type']= $files['type'][$key];
            $_FILES['multi_images[]']['tmp_name']= $files['tmp_name'][$key];
            $_FILES['multi_images[]']['error']= $files['error'][$key];
            $_FILES['multi_images[]']['size']= $files['size'][$key];
            // here we change file name on run time
            $fileName = $title .'_'. $image;
            $images[] = $fileName;
            $config['file_name'] = $fileName; //new file name

            $this->upload->initialize($config); // load new config setting 

            if ($this->upload->do_upload('multi_images[]')) { // upload file here
             echo "<pre>";
                print_r($this->upload->data());
                // performs your operations
            } else {
                return false;
            }
        }
        return $images;
    }
}
After controller let's create view part
<html>
<head>
<title>Upload Form</title>
</head>
<body>

<?php echo form_open_multipart('multi_upload/do_multi_upload');?>
   <input type="file" name="profile_pic[]" size="20" multiple/>
   <br /><br />
   <input type="submit" value="upload" name="submit_form"/>
</form>

</body>
</html>
now you can hit url on your localhost and try to select multiple file and upload. You get your data and performs your database operations. After uploading image you get this screen
Multiple file upload in codeigniter

How to upload image in codeigniter

Leave a Comment
Hello guy's, Today we gonna look how to upload image with codeigniter. In this tutorial we will use CodeIgniter's File Uploading Class which help to upload file. Using this class we can also set various preferences, restricting the type and size of the files.

Creating the Upload Form i.e. image_upload.php (View)

<html>
<head>
<title>Upload Form</title>
</head>
<body>

<?php echo form_open_multipart('image_upload/do_upload');?>
<input type="file" name="profile_pic" size="20" />
<br /><br />
<input type="submit" value="upload" name="submit_form"/>
</form>
<?php if($error) { echo ($error['error']); }?>

</body>
</html>
You'll notice we are using a form helper to create the opening form tag. File uploads require a multipart form, so the helper creates the proper syntax for you. You'll also notice we have an $error variable. This is so we can show error messages in the event the user does something wrong.

image_upload.php (Controller)

Using a text editor, create a controller called image_upload.php. In it, place this code and save it to your applications/controllers/ folder:
<?php if ( ! defined('BASEPATH')) exit('No direct script access allowed');

class Image_upload extends CI_Controller {

function __construct(){
 parent::__construct();
        $this->load->helper(array('form', 'url'));
}

public function index()
{
 $arrData['error'] = '';
 $arrData['content'] = 'image_upload';
 $this->load->view('template',$arrData);
}

public function do_upload(){
 if($this->input->post('submit_form')){
  $config['upload_path'] = './uploads/';
  $config['allowed_types'] = 'gif|jpg|png';
  $config['max_size'] = '100';
  $config['max_width']  = '1024';
  $config['max_height']  = '768';

  $this->load->library('upload', $config);

  if ( ! $this->upload->do_upload('profile_pic'))
  {
                    $error = array('error' => $this->upload->display_errors());
   $arrData['error'] = $error;
   $arrData['content'] = 'image_upload';
   $this->load->view('template',$arrData);
  }
  else
  {
          $arrData['upload_data'] = $this->upload->data();
   $arrData['content'] = 'upload_success';
   $this->load->view('template',$arrData);
  }
 }
}
}
Now create uploads upload folder in root of your CodeIgniter installation and set its file permissions to 777.Now the last thing creating upload_success view

Creating upload Success view i.e upload_success.php (view)

<html>
<head>
<title>Upload Form</title>
</head>
<body>

<h3>Your file was successfully uploaded!</h3>
<ul>
<?php echo "<pre>"; print_r($upload_data); ?>
</ul>
<p><?php echo anchor('image_upload', 'Upload Another File!'); ?></p>
</body>
</html>
To try your form, visit your http://localhost/Proejct_foldername/image_upload. If you did't remove your index.php from url then you have to try with index.php in your url. Learn Here how to remove index.php from codeigniter Try uploading an image file (either a jpg, gif, or png). If the path in your controller is correct it should work. After successfully upload image you will get below output on upload_success page.
How to upload image in codeigniter

How to create a 404 page in CodeIgniter

Leave a Comment
This post is about creating a custom 404 page in CodeIgniter. There are so many reasons for having 404 page. Because you cannot avoid user typing incorrect URL pointing to a page on your domain which doesn't exists. Also there is some website can link to some url on website which no longer valid.

Codeigniter provides it's own 404 page which is ok. But we can create our own custom 404 page.CodeIgniter provides an easy way to build a custom 404 (Page-not-found) page. Here is the step by step on setting up a 404 page for your CodeIgniter website.

1. Create a new Controller


Create a new controller custom404.php. And Paste below code
<?php
class custom404 extends CI_Controller
{
    public function __construct()
    {
            parent::__construct();
    }

    public function index()
    {
        $this->data['content'] = 'custom404_view';  // View name
        $this->load->view('template', $data);   // load viwe
    }
}
?>
    

2. Create a view


Now create a view or your custom 404 page html design the way you like.

3. changes in routes.php


Now edit your routes.php which is present in application/config/routes.php. Change the following line in file
$route['404_override'] = 'custom404'; // Change your Controller name
    

Now try to put wrong url on browser you will get you custom 404 page.
Enjoy......:)

PHP With MySQL For Beginners Day 1

Leave a Comment

What is php?


PHP is a server scripting language. Now you may have thought that PHP was a programming language. Well, technically speaking, it's not. So how's a scripting language different from a programming language? A script only runs in response to an event. It also usually runs a set of instructions by working down the page from the start to the end. It has little or no user interaction after that initial event. So PHP script does not run until a web page is requested. Then it launches, follows its instructions from top to bottom, and then quits until another action launches the script again. On the other hand, a program, runs even when not responding to events. It continues to run, and to wait for interaction.


History of PHP


Php Version 1 was written by Rasmus Lerdorf in 1994.Version 2 was a more formalized version that he put out in 1995. But in version 3, PHP changed dramatically. Two other developers got involved, Zeev Suraski and Andi Gutmans. These two developers rewrote major parts of PHP between 1997 and 1998. they also renamed it PHP hypertext preprocessor. Now you can see that in those three words we still have the initials P, H and P, but the first word in the acronymn is the acronym itself.After that Php 4 is responsible for making PHP incredibly popular. PHP 5 includes a lot of new features, such as better performance, improved object oriented programming and some better database connectivity.

Why we have choose PHP?


First of all php is my fav scripting language. There are many reasons to use PHP. This first is obviously that you've discovered the limits of HTML and now you need something more. Php is open source. Open source means the source code is available for all to study , to modify or to user.
And its free software so its free to download and free to user there is nothing purchase or no licensing fees. I want to tell you one more thing php also cross platform to develop and deploy. So its means you can php any where on windows , linux or mac server. I think its enough of convince why we have to use php. Facebook is in php. I think you have to watch this The Social Network Movie. This is my one of favorite movie this movie inspire to learn php
I hope after all this thing. you're excited to get started. So lets check what we need to run php.

1) Web Server
2) Database Server
3) Text Editor
4) Browser

For Web Server we don't need to buy domain or any server. We can run php on our local machine we have to just download few software which are free no need to by license.
Those combinations we refer to as The Stack. And the different stacks that are most popular are referred to as LAMP, MAMP, WAMP, and XAMPP. For LAMP, it's LAMP, which stands for Linux, Apache, MySQL, and PHP. And then for the M, it stands for Macintosh, the W in WAMP is for Windows, and the X is for all three of those.
I am using windows so i will go for XAMPP as a server and sublime as text editor.Download XAMP From here. After download just double click and click on next you php and phpmyadmin will automatically install.

Now that we have PHP installed. Were ready to start learning how to use it. So let's start with our first php program. Open your text editor copy paste this below code
<?php echo "Hello Php now i started work on you"; ?>

Save this file as Hello.php I am using windows with xampp so my root directory is C:\xampp\htdocs. Under htdocs i created Php and inside that day1 folder to save my file you can see in image


After writing your php program we have run this file in browser so for that localhost/filename.php. If you have file inside folder then localhost/foldername/filename.php. To run my file http://localhost/Php/Day1/Hello.php i will run like this.
If its give this kind of page


Its means you did't start your Xampp server so start your xampp server


Again hit the url then you are go Congratulations your first php code is run


So, guy's that it for the day1. For day2 we will start with combination of html and php and declare php variable and more cool things

Guy's if you like this please comment below or share this page with you frnds. If you any problem or question please ask to me on comment

Deploy app on heroku

Leave a Comment

Deploying your first app on heroku

Follow this steps to deploying your first app on heroku

Step 1

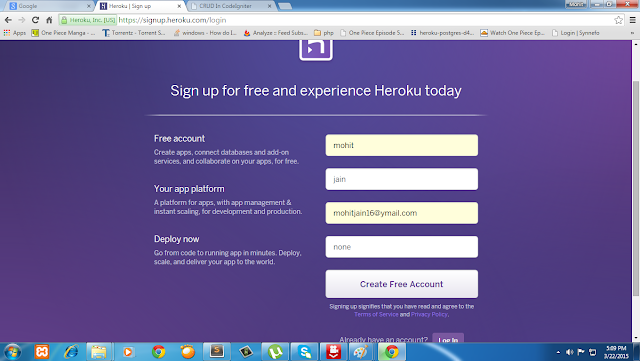
Creating account on heroku

step 1

Step 2

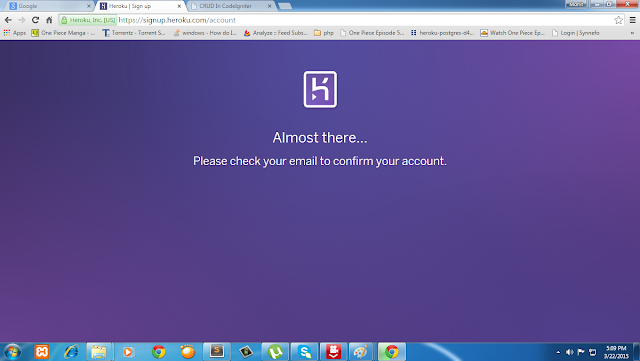
Confirm your account

step 2
After confirming your you will get screen to change your password

Step 3

Change you password

step 3


After that you will get welcome screen

step 4


Click on proceed you will get this screen

step 5


Step 4

Click on plus sign on right side of browser screen

step 6


After click on create app you will get this screen

step 7


Step 5

Download Heroku Toolbit & install heroku toolbit

step 8


step 9


Step 6

Go to your app which you have to deploy on heroku. Click mouse right side click you will get this menu. After click on git bash

step 10


step 11


Step 7

Create a new Git repository
Type some command to Initialize a git repository in a new or existing directory
$ git init
$ heroku login


login with your heroku credentials After that type

$ git remote -v
if your get any remote connection then remove that connection and add new remote connection

$ heroku git:remote -a name_of_your_app
you will get success message. After that again run $ git remote -v

step 12


Step 8

Deploy your application
After to all this step your app is setup. Now Commit your code to the repository and deploy it to Heroku using Git.
$ git add 
$ git commit -am "write your comment"
$ git push heroku master


step 13

Powered by Blogger.